As I mentioned yesterday, I love using the curve templates from Elisa’s Back Porch. When I discovered that the 8” Rainbow Template fit perfectly on a layer cake it became one of my go-to quilts. It takes less than an hour to cut all the pieces and only a few hours more to piece the top. If you have never used these templates, I really encourage you to try them. Both the cutting and piecing go quickly and the quilts always turn out great! I have all four sets of the “Crazy Curves” series: 7”, 3-1/2” , 8” and 4”. The 7”and 3-1/2” sets work together and the 8” and 4” sets work together so you can combine large and small blocks in the same quilt like I did on this one (one of my favorites!) I used the 7” and 3-1/2” templates.

For the current quilt, though, I’m only using the 8” set. It contains an additional shape so you can create a center circle in each block.

The templates come with a brown paper backing that you can peel off if you want. I’ve left the paper on because it adds a little bit of friction and the template doesn’t slip as easily when you’re cutting. For this project, I used Templates B, C, and D (Template A combines C & D to make a 2-piece block instead of a 3-piece block). On this quilt, the center ring will make the blocks more interesting.
As you can see, the three template pieces fit nicely on a 10” square. If I were cutting this from stash I would still cut 10” squares to make it easier to cut the units. Typically I stack 4 squares, align all the edges and cut them together. It’s helpful to use a small cutting mat or a rotating mat so you can turn the pieces without lifting them.

You’ll be cutting piece B first, so remove templates C and D from the fabric. Align the right angle of template B with the edges of the fabric. Cut the straight ends first, make sure all the edges are still aligned, then slowly and carefully cut the inner curve. It works better if you use a 45mm or 28mm rotary cutter on the curve. The smaller blade will hug the curve better. Also make sure your blade is sharp!

Set piece B aside and rotate your mat 180 degrees. Align the right angles of template C on the edges of the square.

Since the right angle edges are already square, you only have to cut the curve. Again, slowly and carefully cut the curved edge along the template.
For the center ring, align the template making sure that both ends are on the fabric. This piece is a little trickier because all four sides are curved. I start by cutting the short ends, then the inner curve, rotate the mat, and finish with the outer curve.

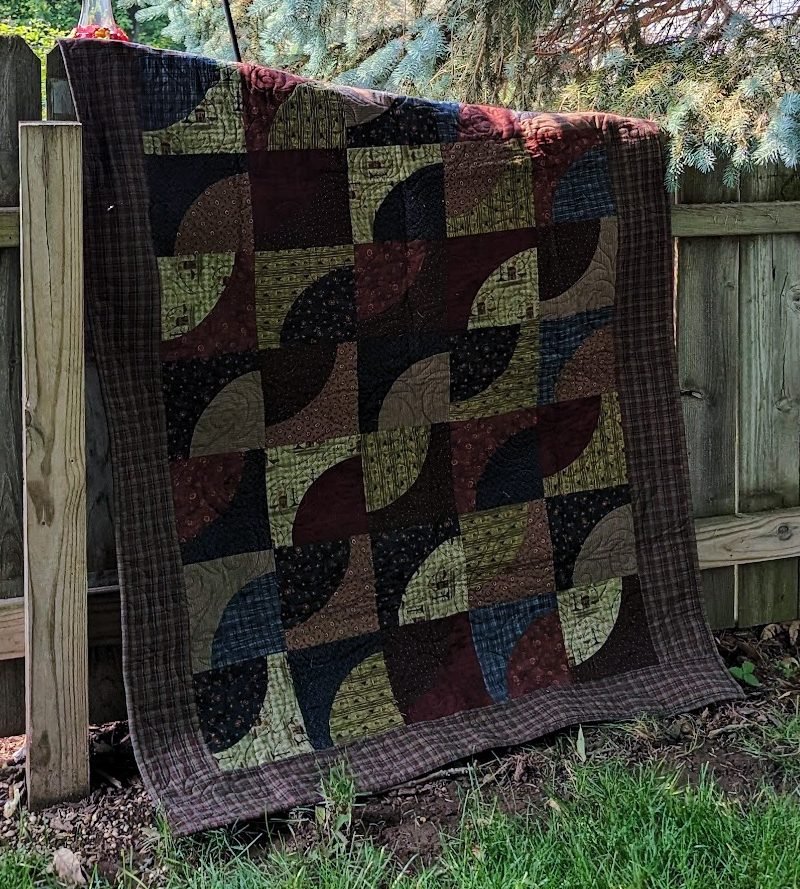
Continue cutting squares until you have the number needed for your quilt. Keep in mind that it takes four squares to make a complete circle. Using a layer cake, 36 squares will make nine complete circles. This will yield a 48” square top before borders. If you want to use all 42 squares, you can add a half circle and offset the circles like I did in this quilt.

If you’re cutting squares from scraps or stash you can make your quilt any size you wish just keep in mind that if you want complete circles you’ll need sets of four blocks.
Once all your pieces are cut, it’s time to sew. The piecing is easy but there are a few tips and tricks that will give you better results.
Start by selecting one D unit with a contrasting C unit.

When you place these next to each other, the D unit looks much longer than the C unit. Trust me. If you sew accurately, they will fit perfectly!!

Flip the D unit on top of the C unit, right sides together. Pivot the C unit so the top edges are aligned at the top. Place a pin about 1/4” from the top so they stay in alignment until you can sew the first 2 or 3 stitches.

Start sewing at the top edge. Make sure your needle is down and remove the pin. Guide the top piece with your left hand and the bottom piece with your right hand. Slowly continue stitching while pivoting the top fabric so the right edge aligns with the edge of the bottom fabric. It is important to keep the raw edges even all the way down the seam. Notice that the top edge will no longer be aligned as you sew the seam. Be careful not to stretch the bottom piece—just hold the bottom piece in place and pivot the top piece to keep the right edges together.

Continue slowly sewing until you are a couple of inches from the bottom.

At this point it will be difficult to hold the top piece with your hand so a bent-tip tweezers will come in handy.

The tweezers will help keep the edges together as you sew the bottom few stitches. Make sure you maintain an accurate 1/4” seam allowance all the way to the end of the seam. If your seam allowance is too wide or narrow at the top or bottom of the seam, the circles won’t match properly when you sew the blocks together.

After units C and D are sewn together, select a contrasting B unit. Again, it will appear that the B unit is too small, but it too will fit exactly!

Once again, align the top edges and place a pin about 1/4” from the top of the seam.

Keep the edges together and slowly stitch this seam the same way you did for the first one. Use the tweezers to keep the raw edges together as you reach the bottom of the seam.

Press and admire your block! Be careful when you press the block that you don’t distort it. You want to make sure the edges stay straight and the block is square.

See how easy these blocks are? The keys to perfect blocks are maintaining an accurate 1/4” seam allowance along the entire seam, not stretching the piece on the bottom and keeping the edges together as you sew.
I recommend cutting a few blocks from scrap fabrics to practice sewing the block before starting your real blocks. It takes a little practice to get the hang of it, but once you do, you can crank out these blocks in no time!


Wow, Rhonda! Great demo! I love your quilts! (You say it’s easy, but it looks hard to me! 🙂
I love the tuitorial…….really looks easy and I have done this and it is! Thanks for sharing. Who was the camera man?