Are you ever a little disappointed when you hang a little quilt on the wall or is it just me? Sometimes they hang a little wonky, the binding isn’t quite straight, the edges ripple, or they are not flat against the wall. I ended that frustration by figuring out another way to hang wall quilts. I simply mount the wall hanging onto canvas, then hang the canvas. It takes a little time but the finish is worth the effort.

I start with a cheap canvas that is the approximate size of the wall hanging. These are frequently on sale at Michaels. You can use a level 1, which is the cheapest because you are not painting a masterpiece on it! Once you know the size of the canvas and the center design area of your wall hanging, it is time to add borders. This particular wall hanging was supposed to finish 16″ x 24″. The canvas is 18″ x 24″ so the top and bottom borders needed to be wider. You also need to add 2″ all the way around the wall hanging so you can wrap the edges of the canvas. After adding the borders, my wall hanging measured approximately 22″ x 28″.

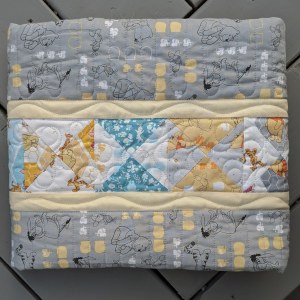
Next, I quilt the wall hanging. After quilting, trim the excess backing and batting even with the quilt borders. Do not bind the quilt.

Center the wall hanging over the canvas. Measure to ensure the design is centered, then wrap the border fabric around the edge of the canvas. Use a staple gun to secure the wall hanging in place. Work slowly to make sure the quilt doesn’t shift. For the corners, I simply fold the fabric over the top (or bottom), then fold the sides in. I find this method creates less bulk on the corners than trying to miter them. Staple the corners down, then work your way around the canvas.

Once everything is stapled down, hang the canvas on the wall and admire your wall hanging!
I hope you will try this to see how easy it is to mount a wall hanging onto canvas.


Love this!