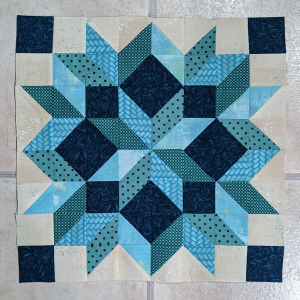
Tomorrow, the second block in The Celebrate Quilt chunk of the month will be released. This quilt requires a lot of half-square triangles. You may already have a favorite construction method. If so, go ahead and use it to make your triangles. I give the finished size required for all of them. Just make sure that’s the size you end up with. If you don’t have a favorite method, continue reading for a few triangle tips and tricks.
If you have been here any time at all, you know that I am always looking for the easiest and fastest way to piece, while still getting accurate results. For this post, I made eight half-square triangles (HSTs) four different ways and timed how long it took me to make them. Scroll down all the way to the bottom to see my results.
There are probably a million online tutorials for making half-square triangles (HST), so they must cause problems for many quilters. I am not sure why. After all, it is only one seam, right? Part of the problem is that this one seam is on the bias and bias stretches. That can be trouble, but I will give you some easy ways to tame that bias so your HSTs come out accurately every time (okay, most of the time!).
First of all, make sure your fabric is pressed well before you begin cutting. It has become trendy to starch fabric until it is stiff to prevent stretching. All over Instagram, you see quilters hanging dripping wet fabric to dry. It dries stiff as a board with no give, which may or may not be a good thing. To starch or not to starch is a whole other post, but for now, I’ll just say I don’t starch. Neither do I pre-wash my fabric so the manufacturers’ sizing gives it a little built-in body. If a fabric has stubborn wrinkles, just spritz it with water or a pressing spray. Once the wrinkles are out and the fabric is smooth, you are ready to cut.
Method #1: start with squares
Maybe the most common way to construct HSTs is to start with a square and bisect it on the diagonal. Traditionally, you would add 7/8″ to the finished size of the HST and cut two squares that size. Place the squares right sides together and either draw a diagonal line and stitch a 1/4″ seam on both sides of the drawn line, or simply cut the squares on the diagonal and chain piece the triangles. This eliminates the need to draw lines.

Layer the two fabrics RST and cut them together. It is hard to get a true square if one half is larger or smaller than the other. If you cut them together, you are assured that both halves start out the same size.

If you are cutting an eighth-inch increment, use a ruler that has an eighth-inch grid. This makes it very easy to cut your squares accurately.

After cutting the squares, you can decide to draw a diagonal line on the back of one square or cut them in half on the diagonal line. After drawing a line for years, I now simply cut the squares in half and chain-piece them.

If you draw a diagonal line, it helps to have 1/4-inch seam tape on the bed of your machine. This makes it easy to simply follow the printed line to sew the seams on both sides of the drawn line. If you don’t have the tape, you can use the Quick Quarter tool to draw the sewing lines. The center line is slotted so you can match up the corners and the edges are a quarter-inch from the center line.

If you find the corner tips of the triangles are being “eaten” by the feed dogs and are pushed down into the needle hole, you can trim the corners before you sew them. You can also use this tool, or a similar one to clip the dog ears before pressing.

Make sure you don’t stretch the seam while pressing. I usually just give each HST a quick press, and stack-press them so they are flat without a lot of pressing. This also makes it very easy to pick the whole stack up at once and clip the dog ears.

Directional prints can be a problem with this method. As you can see here, the green fabric has a subtle stripe. This method results in the stripes in each half of the square going in opposite directions; half the stripes are horizontal and half is vertical. It doesn’t bother me too much with this print, but it would with a more pronounced stripe. It also depends on the block you are making. Sometimes the HSTs are turned so the print may or may not be going in the same direction. In this particular block, all the HSTs have the same orientation so the stripes go both ways. If you need a lot of HSTs from the same fabrics, it probably wouldn’t be a problem because you would make enough to match the stripes. Otherwise, you might want to choose a different construction technique.
Method #2: specialty ruler
My favorite way to construct HSTs is with a specialty ruler.

There are several rulers that work for this including the Omni 96 (or 96L-for larger HST), Easy Angle, Essential Triangle Tool, and Fons & Porter Flying Geese Ruler. The primary reason I like this technique is that you can cut squares and HSTs from the same strip of fabric. For example, the block shown above takes seven 2″ finished HSTs and two 2″ finished squares. You can cut everything from two contrasting 2-1/2″ strips. It is only a little exaggeration when I say I have a million 2-1/2″ strips in my stash. In 2000 Debbie Caffrey published the book, Open a Can of Worms, and that book changed my quilting life. Since then I have been cutting scraps and stash into 2-1/2″ strips. They are so versatile and work for many blocks.
If you have never used a ruler like this, I have a little tutorial here. Each ruler works a little bit differently, so be sure to read the instructions that go along with your ruler so you know where to line it up. Here are a couple of tips for cutting HSTs with a specialty ruler.


Make sure the strips are straight and even. If they start out with the dreaded “V” in the middle or are wonky, you won’t get good results. Press the fabric before cutting strips and cut on the straight of grain. Layer fabric right sides together before cutting. This way, you can quickly chain-piece them through the machine. Make sure you don’t stretch the triangles as you feed them through the sewing machine.

If you have trouble with the pointed tip of the triangles getting pushed down into the needle hole on the throat plate when you start sewing, then flip them over and lead with the blunt end.
When working with directional fabric, you can get all the triangles going in the same direction by cutting half with the directional fabric face down and half face up. I’m sure there is a geometry lesson in this, but it might be just magic! Make sure of the orientation of the triangles in your block to see which direction you need the fabric to go.
Method #3: magic eight
This technique is again having a moment. It was popular back in the 1990s and it appears to have been rediscovered.

Essentially, it works the same as the first method, but you double the size. To make eight 2″ finished HSTs, cut two squares 5-3/4″ (2-7/8 x 2). Draw diagonal lines corner to corner on both sides.

Sew 1/4″ seam on both sides of the drawn lines.


Press the square flat before cutting. Measure 2-7/8″ from the edge and cut. Turn 90 degrees and again measure 2-7/8″ from the edge and cut. Then cut on the drawn lines on both diagonals. You now have eight HSTs ready to press. This method works well and it’s fast, but again if you are using directional fabric, half will be vertical and half horizontal.
Method #4: Cut oversize and trim
It seems like every pattern I’ve purchased in the last two or three years has instructions for cutting HSTs oversized, then trimming them to size. After being caught unawares once and cutting hundreds of oversized squares, I now read through patterns and adjust the cutting instructions so I don’t have to trim.
Nothing about cutting oversize makes sense to me. First, it is ridiculously time-consuming. Second, if you can’t sew an accurate 1/4″ seam for the HST, how are you going to sew accurately when you piece the block? And third, it adds an additional step for something to go wrong. Don’t even get me started on quilters who say it is easier to find the 3″ line than the 2-7/8″ I just don’t see the difference. My quilting mantra has always been: cut accurately, sew accurately, and be done with it.
Whew–now let me step off my soapbox! For the sake of research, I did cut a set of eight oversized squares so I could time it and see how much longer it actually takes to cut little, bitty slivers off the sides of HSTs. I used Method 1 for my experiment and cut 3″ squares instead of 2-7/8″. Sidenote: I Googled Magic 8 HST method and EVERY. SINGLE. REFERENCE. in the search results called for cutting the initial square oversize. So instead of cutting a 5-3/4″ square as I did in Method 3, the instructions called for cutting a 6″ square. If it is still your preference to cut the squares oversize, here are a couple of tips to help square up to the correct unfinished size.

Use the right ruler for the job. This little Omnigrid ruler works great. Just line up the 45-degree angle line with the seam, slide it to the 2-1/2″ line on the top and left sides, then trim along the right side and bottom.

Trim BEFORE pressing. This may be a faster method if you do not have a ruler with a diagonal line. I have a little ruler called (appropriately), Easy Square that has arrows to help align the triangle. Just place the arrows on the seam, then cut both sides to size.

If you don’t have a special ruler to trim, simply place tape on your ruler. I love this medical tape for the job. It creates a little lip and you can butt the seam against the tape to quickly position the ruler and the ruler will not slip.
So which method is the fastest? Here are the results when I pieced eight 2″ finished triangles using each method:
Method 1: Cutting 2-7/8″ squares, then cutting diagonally-7 minutes, 30 seconds
Method 2: Using the Omni 96 ruler and 2-1/2″ strips- 6 minutes, 24 seconds
Method 3: Magic 8; cutting exactly, not trimming-6 minutes, 35 seconds
Method 4: Cutting 3″ squares, cutting diagonally, then trimming-11 minutes, 55 seconds
If you are piecing a quilt with 48 blocks and each block has eight HSTs, then it will take you about 4-1/2 hours longer to make the top. I can think of a million ways I would rather spend 4-1/2 hours than cutting little slivers of fabric. Haha! Seriously, though, I make thousands of HSTs every year, so the extra time is considerable. Of course, if that is what gives you the best results, then that’s the construction method you should use. After all, accuracy is the ultimate goal.
I hope these tips will give you greater success when piecing HSTs. Even though there is not much time difference between using a specialty ruler and the Magic 8 method, I will continue using the ruler. I have more control over directional fabric and it offers the flexibility of being able to cut squares, triangles, and even rectangles, chisels, tumblers, and other shapes from the same size strip.
Of course, there are many other ways to construct HST, such as four-at-once, drawing a big grid, bias tube, and bias strips sewn together. I don’t recommend the four-at-once because the outside edges are all bias. The other methods are a little more time-consuming.
I hope you find a method that suits you and results in perfect half-square triangles.


Thank you for this. I’ve been wondering which method is quicker. I’ve tried them all. Something I also discovered, while struggling with half square triangles and flying geese is the method that best clicks in my brain. For hst it is the easy 8 method. Flying geese, well, let’s just say I’m still searching.
Several years ago I purchased a specialty ruler for half square triangles. It now sits in my drawer. I also purchased one to help with flying geese. That one also sits in my drawer. A couple of my local quilt shops offer sit and sews one or two days a week. They have drawers of specialty rulers. I’ve tried them all. I haven’t found one that I care to use let alone purchase. So I stick with my 3 or 4 square and rectangle Creative Grids rulers. The results aren’t perfect, but I can live with the way they turn out.